Auto Interlinking Products
" Thank you for purchasing our plugin. please feel free to email via our user page contact form here. Thanks so much! "
A Magical tool to help to add automatic interlinking through keywords & phrases on pages
Why Interlinking?
Googles use links to find out what content on your site is related and what the value of that content is. Interlinking to pages enhances site page rank & helps to attract the user to connected pages. As per SEO Experts, interlinking helps setting better website navigation.
Don't know how to implement with Magento?
Don't worry!! Our Automatic Interlinking extension allows you to create keywords & Link URL to be replaced our product pages & you are done. This extension, auto detects keywords from the product or CMS pages & replace it with target URL. Our extension, configuration area you can choose if this interlinking operation should take place on the product page, category page and/or CMS pages. Cross-Linking algorithm searches through predefined content blocks listed as below
- Product Description
- Product Short description
- Product Specification Attributes
- Category Description
- CMS pages content
Here is few highlighted features:
- Manage Auto Interlinking keywords & URLs from the backend
- Keyword Replacement activation filter for product pages, category pages & CMS pages
- Max Replacement Countsetting for each page & keyword
- Mass Keywords import can be done via CSV
- Export Interlinking Keywordscan be used with mass editing action
In this step by step documentation we will show you how to install a Auto Interlinking Products.
Step 1. Backup your web directory and store database
Step 2. Download Extension package file
Step 3. Upload & Unzip package folders to store root
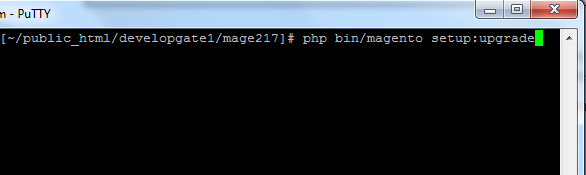
Step 4. Login into SSH console & reach to store root folder:
cd path_to_the_store_root_folder
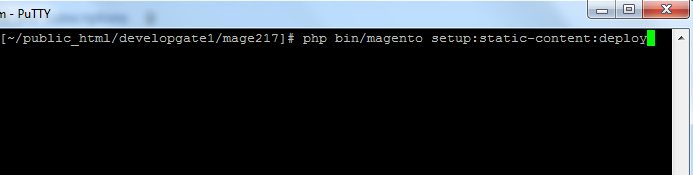
Open Magento Root directory & run below series of commands one by one
php bin/magento setup:upgrade
php bin/magento setup:di:compile
php bin/magento setup:static-content:deploy
php bin/magento cache:flush
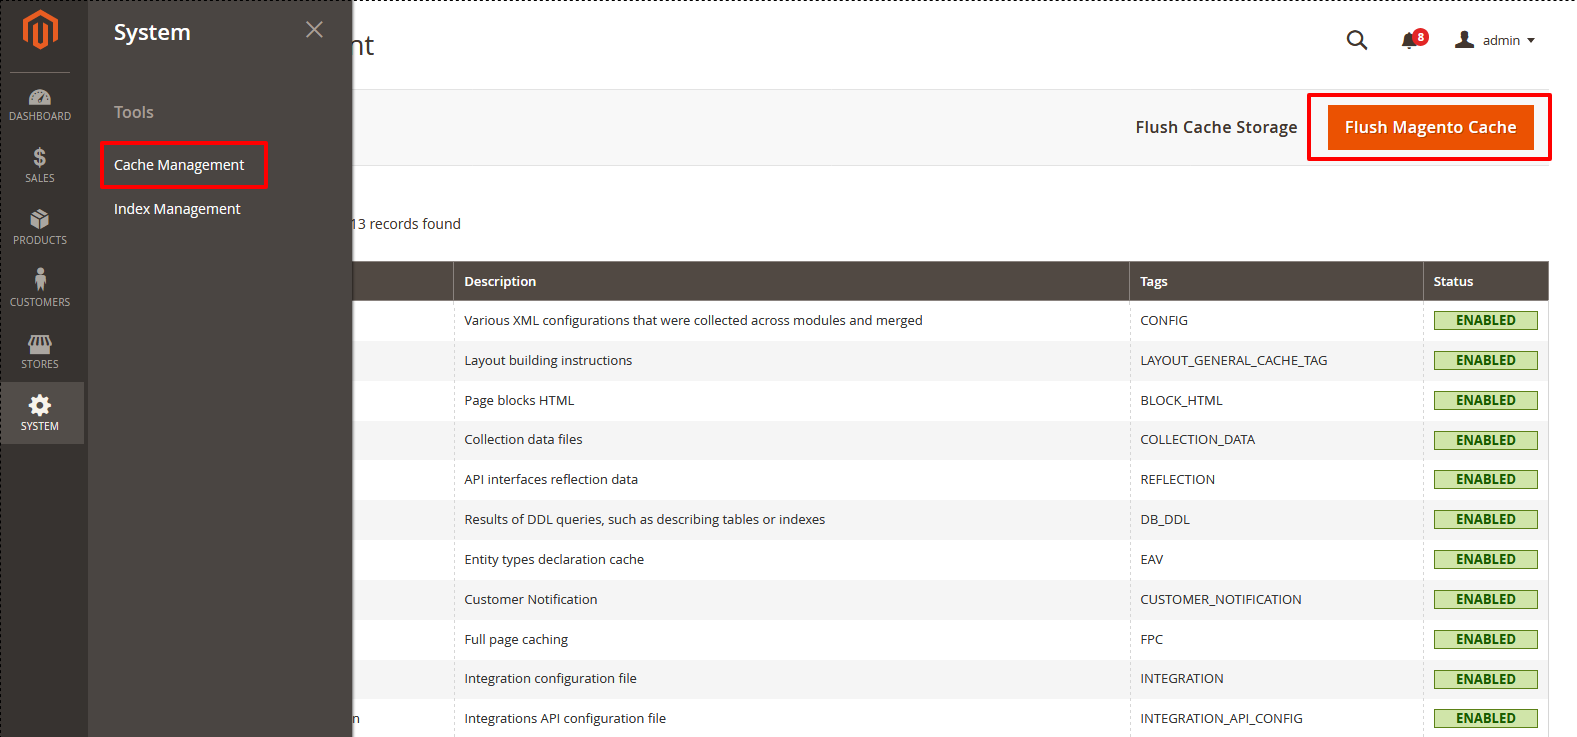
Step 5.
From Backend,System > Cache Management.
1. Flush Magento Cache
2. Flush Cache Storage
3. Flush JavaScript/CSS Cache
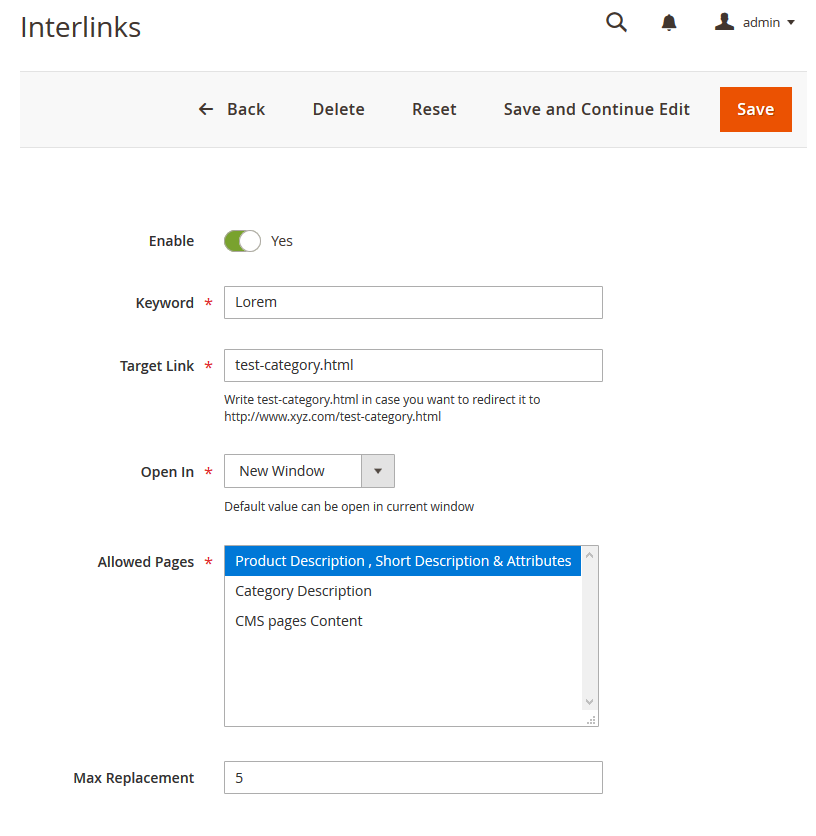
"If you have any other questions or problems regarding this plugin, you can always contact me using the contact form on my profile page and I'd be happy to help. No guarantees, but I'll do my best to assist."
Our support operators are always glad to help you here [email protected]
Note: We are happy to help with setup and any bugs you may stumble upon.